Thursday, December 25, 2014

Week 7 Assignment: Putting it together

December 25, 2014
Regardless of one’s religious affiliations today marks a special day for families and friends, a day to remember how important these relationships are in our lives. It is a day filled with rituals, and we usually celebrate it with gift giving and the sharing of a festive meal. And the crowning glory of the meals is dessert, of course! So I selected the cannolo to draw today. It is a traditional Italian dessert reserved for special occasions. Its crisp shell is filled with a ricotta cheese, sugar and candied fruit mixture. I enjoyed it with a cup of Ghirardelli hot chocolate topped with mallow bits and dashes of cinnamon and nutmeg. 

Image #1: I started by measuring the main objects, so as to have a correct proportion of the cannolo, saucer  and cup, marking the height and width of each. Then I used Derwent brown-ochre and blue-grey watercolor pencils to draw a gestural set-up of major shapes.  I followed this with a Lamy Safari pen drawing in black ink of the main objects. Finally I added watercolor paint. When this was dry, I made some ink lines heavier to help define the edges. 

This was my first attempt at using this paper and a 2-page spread. I found that the paper handled the ink and the watercolor paint well. The only part that needs improvement is my application of watercolor paint to larger areas of the paper. A larger paint brush would likely help. I thought of adding a design element to the fabric, which is present in the actual placemat, but decided it might be too much of a distraction from the main object. The salt and pepper shakers turned out well.

FYI: My scanner made the dark vertical line showing the page's crease--not sure how to minimize that other than using photo-editing software.  I use a Canon MP970 scanner. I find that it takes a quality photo, which I then edit slightly for saturation and sharpness in iPhoto. The result is fairly close to the original. The size of the platen is a limiting factor in scanning a 2-page spread, as seen below. 


Week 7 Assignment: Image #1 Connolo
Watercolor pencil gestural set-up and ink drawing.
Daniel Smith watercolor in a Strathmore 500 series watercolor sketchbook--
a vellum-surfaced, 100% cotton paper.


Saturday, December 20, 2014

Week 6 Assignment: Minimal Set-up

Week 6 Assignment: Gestural Set-up and No Set-up of Objects
For this assignment I used my my outdoor sketching bag and my pencil & pen case. Although the blue bag is a bit bulky, it holds all my sketching essentials with room to spare. It is large enough to hold extra layers of clothing for winter sketching. The contents of both bags are featured in the Week 1 Assignment. 

Image #1
I made a gestural drawing in graphite and then used my Lamy Safari pen for the ink lines. The soft contours of the bag hide some errors—mainly that the large bag is too short, but it reads OK on the page. I’m still not used to the Lamy pen which slows down my drawing. I feel that there are too many lines on the interior of the large bag and that thicker/darker lines would have helped in places. Need to practice more with the Lamy Safari pen.


Week 6 Assignment: Image #1
Graphite pencil set-up
then drawing with Lamy Safari pen (Noodler's black ink)
 on Canson drawing paper. 

Image #2
I drew the same objects using the Gestural sketch approach. I am most comfortable using the gestural approach and then doing some measurement and checking of angles, etc. The Inktense pencils worked well for making a non-measured sketch of the two bags. Then I added watercolor—which I proceeded to overwork. I finally said to myself, ‘you are not making it any better, so stop and let it dry.’ Thanks, Liz, for that advice! 

I find that Aquabee’s Super Deluxe sketch book paper is good for quick sketching, but not optimal for watercolor. However, the paper, which is highly sized, held up well despite my overworking of the blue bag. The application of watercolor in the pink bag is a freer use of the paint. After the initial application of watercolor had dried overnight, I added a few details to the blue bag with darker blue watercolor and Inktense colored pencils . I think that setting a time limit for myself would help to avoid overworking the paint.

Week 6 Assignment: Image #2
Gestural sketch using Inktense colored pencils;
Daniel Smith watercolors on Aquabee Super Deluxe sketch paper


Friday, December 12, 2014

Week 5 Assignment: Measured Set-up

Week 5 Assignment: Measured Set-up
One aspect of this class that I’m enjoying is organizing a still life composition. I’m re-discovering objects that I’ve come to take for granted over time. Drawing and painting them has made them special again—like the handmade, glass perfume bottle, and the pottery dish made by a friend now deceased. It reminds me of the primary thesis of the book, Homo Aestheticus. In it Ellen Dissanayake makes the case that the artist makes the ordinary special. That  certainly is the case of the bottle and the dish.

Image #1: Measuring the set-up and initial sketch
This process forced me to slow down even more to take a closer look at size and relationship of forms. I seem to want to quickly sketch, rather than take the time necessary for accurate rendering.  The small shell was the most difficult to draw because of its foreshortened shape and it turned out slightly elongated. I used water-soluble pencil for the measure-up and what turned out to be a water-soluble pen (my mistake.) The ink bled a bit and I had to be careful when I added the watercolor.

Week 5 Assignment: Image #1
 Initial sketch-- measured set-up
Water-soluble graphite and gel pen on Aquabee Super Deluxe sketch paper

Image #2
Adding watercolor was difficult today because of the storm which has leached almost everything of color. Mixing the color, even when using an Ott light was a struggle. More of the same weather was forecasted, so I opted to ‘carry on’. Trying to capture the iridescence of the small shell was a challenge. Most of it was in shadow and I added white pen over the color where the white of the paper had been lost. Notice that the shadow of the bottle adds a fifth shape to the image—an unplanned element that I think adds to the composition.

Week 5 Assignment: Image #2
Watercolor added to initial sketch
Daniel Smith watercolor on Aquabee Super Deluxe sketch paper

Image #3 Measured set-up of a door
For the final segment of this week's assignment I headed over to a local restaurant which has an imposing entryway. The building is painted two shades of ochre and provides a warm backdrop to the rusted metal Bonsai.  Sunnyvale is a small city with uninspiring architecture, so this memorable entry deserved to be sketched.  However, I had not bargained for its challenging design. The arches took several tries and the off-center viewpoint made it even more challenging. To add to the drama, I was ensconced in my car on a rainy morning, huddled in a blanket to keep warm.

I don't think that I could have drawn this doorway without using the measured set-up process. I started by centering the composition and then used the door as the measure for scaling the rest of the elements. The door itself is just glass within a metal frame. I've done very little architectural drawing and so this was a stretch for me. Especially difficult were the angles for showing how the doorway on the right side moved back into the space. I decided not to add watercolor to the drawing, but used an ink line more in keeping with the Asian theme of the restaurant. Some of the set-up pencil lines were kept and are faintly visible.


Week 5 Assignment: Image #3 Measured set-up of doorway
Media: Initial drawing using No. 2 Berol graphite,
then using Pigma 05 pen for the final drawing
on Canson drawing paper

Pencil vs ink use with watercolor: 
In the distant past I have almost exclusively used pencil, usually a light HB graphite, or a silver colored pencil to make preliminary drawings for traditional watercolor paintings.  Two years ago when I began to sketch outdoors again, I tried using water-soluble graphite and liked its versatility. Sometimes I’ve added water to it to make a grey wash.

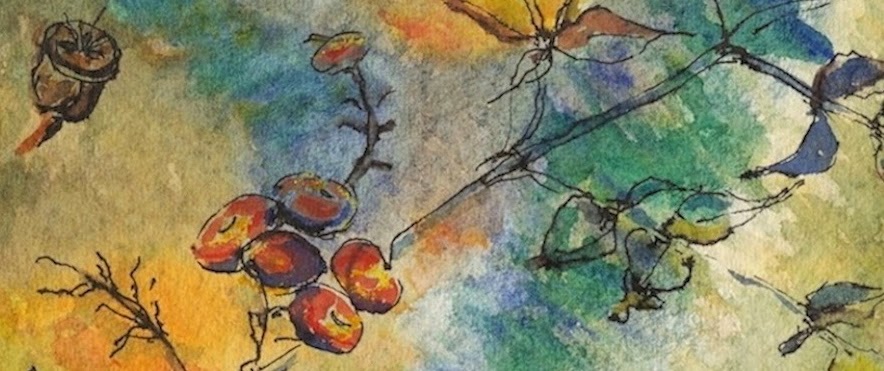
Using ink for preliminary drawings is relatively new for  me. In the past if I used ink, it was as the primary medium for a sketch. However, the banner on the this blog shows an example of when I put down watercolor first. Then I drew in ink over it, and then added color to define the shapes of berries, etc. I find that mixing media creates its own magic.

I like using both pencil and ink for drawing—but I have done so as my creative impulse, or subject, or both move me. Sometimes I just bring my Lyra watercolor crayons along on a sketch outing and enjoy their freedom of line and color. The challenge of using different media helps keep my work fresh. I was curious about what other artists were doing, so I took a look at the Urbansketchers’ Blog for this week. It was delightful to see artists using a wide range of media, and combinations of media, for unique self-expression.


Monday, December 8, 2014

Week 4 Assignment: Constructing Volumes

Week 4 Assignment : Constructing Volumes
Still Life Set-up: This week I selected books on a topic close to my heart—my Italian cookbook collection. I chose for sentimental reasons, Maria Louisa Tagliente’s, Italian Cookbook (1955). The second is a small cookbook containing recipes from Sicily. The final book is Lorenza De’ Medici’s, Florentines, which contains recipes from Florence’s  Renaissance and beautiful period illustrations. To accompany this visual gastronomic feast there is a Corzetti recipe booklet and the top half of a Corzetti pasta stamp. 

FYI: I have a permanent injury to the wrist my dominate hand and my line quality often deteriorates over a studio session.

Image #1: Initial Drawing 
I enjoyed doing the drawing and found that focusing on point-to-point lines and relationship of volumes to one another to be helpful. The perspective is not quite right, but I decided that my pleasure in using these books as my subject should not be spoiled. I think that the books on the right should have been drawn larger, and the Corzetti stamp is too large in relationship to the books—oh well, next time.

Week 4 Assignment Image # 1:
Initial sketch using water-soluble graphite pencil on Aquabee Super Deluxe paper

Image #2: Addition of watercolor to the initial drawing 
I’m struggling with adding watercolor paint, I’m out of practice. However, I did switch to an Isabey #8 sable brush which has a lightly stiffer flex and works better for painting smaller areas. It definitely gave me better control when applying the paint. On further reflection I found  that the lighting of the books by a fluorescent work lamp is inadequate and should have been elevated to give better shadows. But I was  in a rush to complete the assignment and flubbed that nicety.

Week 4 Assignment: Image #2
Addition of watercolor to initial sketch

Aquabee Super Deluxe Sketchbook paper
Daniel Smith watercolor, Isabey #8 sable brush

Image #3: Drawing a chair’s volumes (pending)
Time constraints this week meant that I have to stay close to home. So I plan to draw my desk chair whose sleek Danish lines I’ve always admired.

Sunday, November 30, 2014

Week 3 Assignment: Focus on Shapes

This week's assignment is to focus on shapes. I enjoyed the challenge of using a more complex, still- life setup. I began with a preliminary drawing to help me locate the objects on the page. I usually do a thumb nail or preliminary sketch to get me into the eye-hand coordination mode. Doing this made me feel more comfortable with the assignment. Focusing on shapes really did help to organize the sketch and kept me from narrowing in on the fussy details.

This assignment was a very good review of the basics in visual thinking that sometimes get pushed to the side over time. I opted to make a preliminary sketch which helps me to organize a composition.
I was satisfied with the #2 sketch because it is a fairly good representation of the shapes. The #3 sketch is definitely wonky/wobbly. The Canson drawing paper is not a good choice for watercolor, but I chose the best of the 3 trials to complete this phase of the assignment.

Assignment Week 3:
#1 Preliminary sketch in colored pencil
showing revisions of point-to-point line

Assignment Week 3:
#2 Shapes in 2 colors using Inktense pencils
on Canson drawing paper 
Assignment Week 3:
#3 Negative shapes in 2 colors
Daniel Smith watercolors on Canson drawing paper


Image #4: I tried to use some local color in the shadows to make the composition more colorful. The grey (ultramarine blue and burnt sienna) that I mixed for the cup turned out too black for me and I would use more blue next time. The paper created buckling on the shadow area of the cup--too wet?

Assignment Week 3:
#4 Connecting shapes and shadows
D. Smith watercolors on Aquabee Super Deluxe sketch paper

Image #5: It's been raining for the past 2 days, so I opted for an indoor adventure to complete the last part of the assignment .  I found these unusual, 4-5 feet tall, pottery urns in the Palo Alto Art Center's courtyard. Unfortunately the light was dim and watery with minimal contrast, so I enhanced the shadows to compensate.


Assignment Week 3:
#5 Outdoor objects and shadows
Inktense colored pencils on Aquabee Super Deluxe sketch paper


Saturday, November 22, 2014

Week 2 Assignment: Feeling Edges

First Exercise: Blind Contour Drawing
Media: Pen on Canson drawing paper

Setting up a still life to draw is the easy part! Blind contour drawing has always been difficult for me. But I managed to produce something recognizable--the edge of the top persimmon is better than I expected. The Inner critic (IC) spoke in a loud voice for this exercise and I had to keep reminding myself that this was a learning exercise. I felt like I was swatting away a pesky fly! I've become so used to quick gesture drawing that slowing down to see the edges take mental effort. But I know from experience that my drawing will improve as a result over time.

The second part of the assignment was to use the 'point-to-point with check back' method of drawing. This was a bit easier for me, but slowing down to see the edges required repeated reminders to myself.

The last part of the assignment was to draw the edge of a building with some foliage to break the straight lines. The house that I can see from my patio was a perfect subject. The lemon tree is very overgrown and in need of a good pruning! I felt more comfortable doing this drawing.

Rumination on line: No matter how crude or inept a line drawing may appear, it always seems to suggest the object. Our brains tend to fill in the details to conjure up the actual object.


Week 2 Assignment: Blind contour drawing
Gel pen on Canson drawing paper
Week 2 Assignment: Point-to-point with check back
Gel pen on Canson drawing paper

Week 2 Assignment: Draw building edge with foliage
Gel pen on Canson drawing paper

Monday, November 17, 2014

Week 1 Assignment: Focus on strong line

First Exercise: Focus on strong line
I did not feel up to going out today, so I set up these items on my kitchen table. The Bennington Pottery soup bowl on the left is a lovely blue and a personal favorite of mine from waaay back. I also included a family heirloom honey jar and my mother's china tea mug. The Hachiya persimmon is a seasonal favorite. So there is a lot of nostalgia at work in my selection of items and I felt connected with the drawing in a way that I had not expected.

I decided to use the Lamy Vista EF pen today. This is the first time in several years that I've used it and I learned that the angle of my wrist needed to create a good line is too difficult for me (result of a a wrist injury). My pen line felt insecure and it shows. I'm used to adjusting my line in pencil, so I felt that I was working against myself and it felt awkward. I used Sennelier WC for the color spot. I think that the overall composition is good. But I definitely need to work on drawing circles in perspective. This was a good exercise that pushed me out of my comfort zone.

Second Exercise: Use pencil to create strong line & add a single color
I decided to simplify the setup for this exercise and I'm glad that I did. It took longer than I expected to add the color. But I'm pleased with the overall effect and composition. I used the Derwent Sketching Wash HB to do the initial sketch. Then added Rexel Derwent WC pencil in Blue Grey with an additional wash of Sennelier WC in Payne's Grey to darken shadows. Need to work on values to create rounded shapes.

Exercise 1: Line using pen with spot of color
on Canson drawing paper

Exercise 2: Line using pencil with addition of single color
on Canson drawing paper using Daniel Smith watercolors

Sunday, November 16, 2014

Assignment Week 1: Color Charts


 Derwent Inktense Watercolor Pencils

Sennelier Extra-fine Watercolors


Assignment Week 1: Sketching Materials

The first Assignment included sketching the art supplies that I use.

My usual supplies are listed below, but I may substitute or add according to whim.

12 x 9" Aquabee Super Deluxe sketch book
9 x 6"   Aquabee Super Deluxe sketch book
8 x 6" Stillman & Birn Extra heavy weight, rough surface (new to try this class)
Specialty papers as needed

Sketching carryall and pencil case contents
Pens: Pigma micron 05 black and Pigma Brush black
Berol Verithin silver colored pencil for watercolor sketching
Berol Turquoise pencils: H, HB, 2B, 4B, 6B
Pencil sharpener
Water-dropper
Kuretaki waterbrushes 2
Daniel Smith sable watercolor brush #8
Isabey sable watercolor brush #8
Water jar
Sponge
Tin box with 24 Derwent Inktense Watercolor Pencils + color chart
Sennelier Extra-fine Watercolors in traveling palette + color chart
Lyra Watercolor crayons (optional and not shown)
Water bottle
Local map if needed

Sketching Materials

 Sketching Tools